
Mould in Aircon: How to Spot It, What It Means and What to Do
Why Mould in Your Aircon Is a Problem You Can't Ignore
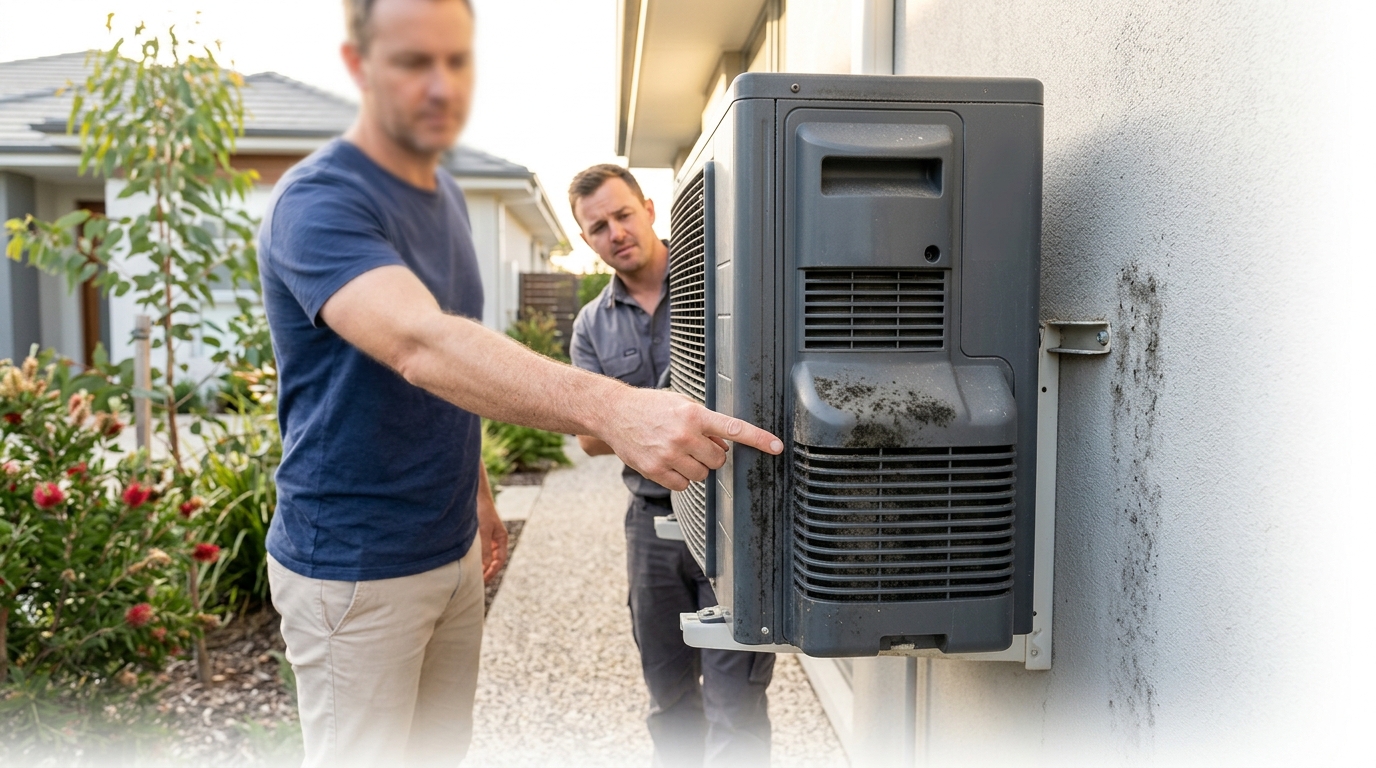
Mould in aircon units is more common than most homeowners realise, and the design of the system practically invites it. The inside of a split system or ducted unit is dark, regularly damp from condensation and full of dust particles that mould spores love to feed on. Left unchecked, it becomes a health risk for everyone in the home and quietly drags down the performance of your system at the same time.
Breathing in mould spores can trigger allergies, worsen asthma and cause ongoing respiratory irritation. On the performance side, mould growth on the evaporator coil and filter restricts airflow and forces the unit to work harder, which pushes up your running costs.
This article covers how to spot the warning signs, what causes mould to take hold in the first place and what you can do to get rid of it and stop it coming back.
Key takeaways
- Mould in aircon thrives in dark, damp conditions and poses serious health risks if left untreated.
- Regular filter cleaning every four to six weeks and annual professional servicing prevent most mould problems.
- A musty smell is the earliest warning sign that mould is present inside your unit.
How to Tell If There's Mould in Your Aircon
The clearest sign of mould in a split system or ducted unit is a musty, earthy smell the moment the unit kicks on. That smell is mould spores being pushed through the airflow and into your living space. Visual signs and performance changes usually follow, but the nose is almost always the first to know.
Watch out for these warning signs:
- Musty or earthy smell when the unit starts running, even briefly
- Visible dark spots (black, green or grey) on the vents, louvres or air filter
- Increased allergy or respiratory symptoms in household members, including sneezing, itchy eyes or a persistent cough that eases when you leave the house
- Reduced airflow or weaker cooling performance, which can indicate mould is blocking the filter or coating the evaporator coil
The tricky part is that mould is often invisible until it is well established. Spores colonise deep inside the unit, in places you cannot see without removing panels or covers. By the time you spot dark patches on the louvres, there is usually a much larger colony somewhere inside. This is why smell is the most reliable early warning you have.
Where Mould Hides Inside the Unit
Mould tends to concentrate in the four areas of a split system or ducted unit where moisture and dust combine most readily.
- The air filter. This is the most common site. The filter traps dust, pet hair and organic particles with every cycle, and because it sits in a humid airstream, it stays damp long enough for mould to take hold. A filter that has not been cleaned in a few months is almost always carrying some level of mould or mildew.
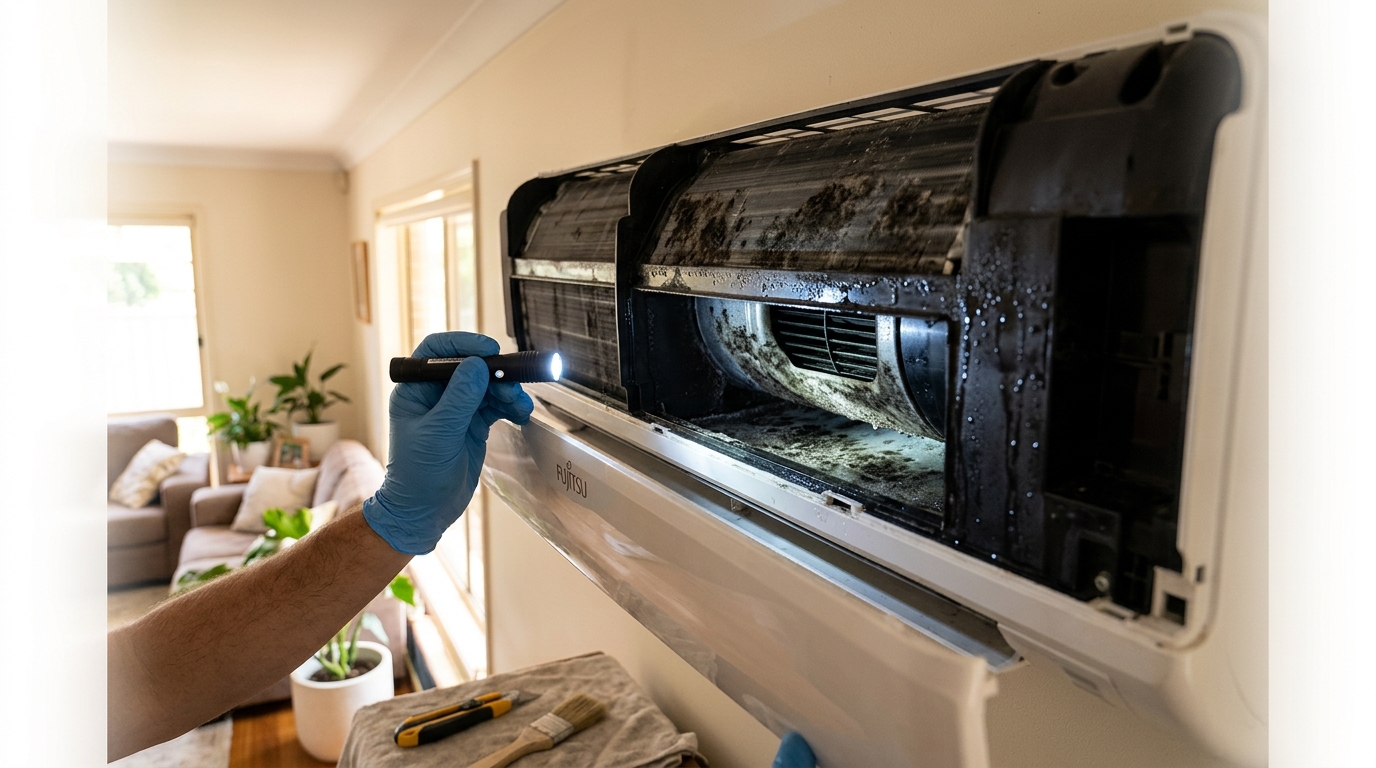
- The evaporator coil. The coil sits directly behind the filter and is where refrigerant absorbs heat from the air. Condensation forms on the coil surface constantly during operation, creating a persistently wet environment. Mould on the coil is harder to spot and harder to clean than filter mould.
- The drain pan and drain line. Condensation drips off the coil and collects in the drain pan before exiting through the drain line. If the line is partially blocked, water pools in the pan and goes stagnant. That standing water is a prime breeding ground for mould and bacteria.
- The ductwork. In ducted systems, mould that starts in the air handler can spread spores through every duct run in the home. This makes ducted mould problems significantly harder to address, since the contamination can reach every room before you notice anything is wrong.
What Causes Mould to Grow in an Air Conditioner
Mould needs three things to establish itself inside an air conditioner: moisture, darkness and organic material to feed on. A split system provides all three in abundance. Condensation on the evaporator coil supplies constant moisture, the sealed indoor unit stays dark during operation and between cycles, and accumulated dust on the filter and coil gives mould spores exactly the organic matter they need to colonise.
Each of these conditions is a direct result of how an air conditioner works, which is why mould is such a persistent problem rather than a one-off event.
- Moisture. As warm air passes over the cold evaporator coil, water vapour condenses on the coil surface. This happens every time the unit runs in cooling mode. The interior of the unit stays damp for hours after the system shuts off, giving mould spores a long window to germinate.
- Darkness. The indoor unit is sealed when not being serviced. Even during operation, the internal components receive no UV light, which would otherwise inhibit mould growth. That permanently dark environment is ideal for spore development.
- Organic material. Every cubic metre of air that passes through the unit deposits a thin layer of dust, skin cells, pet dander and pollen on the filter and coil. This organic film is the food source that sustains a mould colony once it takes hold.
Australian conditions make this worse in several ways. Coastal and tropical climates, particularly in Queensland and northern New South Wales, bring high ambient humidity that keeps the interior of the unit wetter for longer after each cycle. Infrequent filter cleaning lets organic material build up faster. Running the unit in cooling mode without adequate room ventilation traps humid air inside the space, and leaving the unit switched off for extended periods in summer allows any residual moisture to sit undisturbed.
Unit sizing also plays a direct role. Split system air conditioners that are undersized for the room they serve run longer cycles to reach the set temperature. Longer cycles mean more condensation, more moisture and a significantly higher mould risk over time. Getting the capacity right from the start is one of the most effective ways to reduce the conditions that mould depends on.
How to Get Rid of Mould in Your Aircon
Surface mould on a split system's filter and louvres can be safely cleaned at home using basic household products. The key is to work methodically, let components dry fully before reassembling and recognise when the problem goes beyond what a DIY clean can fix. Before you start, put on rubber gloves and a disposable face mask, and open windows in the room to keep it well ventilated throughout the process.
- Turn off and unplug the unit. Switch the system off at the wall controller and then disconnect it from power at the wall socket or isolator switch. Never attempt to clean any part of the unit while it is powered on.
- Remove and wash the air filter. Slide the filter out of the indoor unit and take it outside or to a sink. Wash it with warm soapy water or a solution of equal parts white vinegar and water, which kills mould spores without harsh chemicals. Rinse thoroughly and leave the filter to air dry completely before reinserting it. Putting a damp filter back into the unit will restart the problem immediately.
- Wipe down the louvres and vents. Use a damp microfibre cloth with a small amount of mild anti-mould spray to wipe all accessible louvres, vents and the inside of the front panel. Work carefully and avoid spraying liquid directly into the unit's electrical components.
- Run fan-only mode for 30 to 60 minutes. Once the filter is dry and reinstalled, power the unit back on and run it in fan-only mode. This circulates air through the interior without producing condensation, helping to dry out any residual moisture from the cleaning process.
- Call a licensed technician for anything deeper. If you can see mould on the evaporator coil, inside the drain pan or anywhere within the ductwork, stop and book a professional service. These components require specialised equipment and cleaning agents that are not safe or practical for DIY use.
It is worth being clear about what a DIY clean actually achieves. Washing the filter and wiping the louvres removes surface mould from the parts you can reach. It does not address mould on the coil, inside the drain pan or further into the unit. If the smell persists after a thorough filter clean, the source is almost certainly somewhere you cannot see.
When to Call a Professional
A professional air conditioning service is the right call in any of the following situations, and attempting to push through with DIY cleaning in these cases will not solve the underlying problem.
- Mould is visible on the evaporator coil or inside the ductwork
- A musty smell persists after you have cleaned and dried the filter
- Mould returns within a few weeks of cleaning, which suggests a colony is established deeper in the unit
- The unit is more than five years old and has never had a professional service
A professional service typically includes a full coil clean using a foaming coil cleaner, a drain pan flush to clear any standing water or blockages, and a complete internal inspection of the blower wheel and housing. These are the components where serious mould colonies live, and they require proper access and the right products to clean safely.
For Australian conditions, annual professional servicing is the standard recommendation. The combination of high summer humidity, long cooling seasons and the dust load in most homes means a split system accumulates grime faster than in cooler, drier climates.
If a technician finds that an older unit is heavily moulded throughout the coil and housing, it is worth having an honest conversation about whether a clean is economical or whether replacement makes more sense. A unit that is 10 or more years old, has never been serviced and has visible mould throughout the internal components may cost more to restore than it is worth. In that situation, a premium replacement like the Mitsubishi Electric 5kW LN Series MSZLN50VGV ($2,621) is worth considering. For those whose older unit is beyond economical repair, upgrading also gives you the chance to look at Daikin split systems, which are a reliable and well-supported option across the Australian market.
How to Prevent Mould in Your Aircon Long-Term
Preventing mould in an air conditioner comes down to controlling moisture and keeping organic material from building up inside the unit. These five habits, done consistently, will dramatically reduce the conditions that mould depends on and save you the cost of a remediation service or early replacement.
- Clean or replace the air filter every four to six weeks during heavy use. The filter is the first place mould takes hold. A clean filter means less organic material for spores to feed on and better airflow through the unit. During summer in Queensland or coastal New South Wales, four weeks is the right interval. In milder climates with lighter use, six weeks is fine.
- Run fan-only mode for 15 to 20 minutes after turning off cooling. This is one of the most effective habits you can build. Running the fan without cooling circulates dry air over the evaporator coil, accelerating the drying process and closing the window that mould spores need to germinate. Most split systems have a dedicated fan mode accessible from the remote.
- Keep the area around the indoor unit well ventilated and avoid blocking return air vents. Restricted airflow traps humid air inside the unit for longer after each cycle. Make sure furniture, curtains and stored items are not sitting directly in front of the return air intake.
- Book a professional service once a year, ideally before summer. A pre-summer service gives a technician the chance to clean the coil, flush the drain pan and inspect the blower wheel before the heavy cooling season begins. This is the single most effective thing you can do to prevent serious mould problems.
- Consider a unit with a self-cleaning or auto-dry function. Some models handle post-cycle drying automatically. The Mitsubishi Electric 2.5kW AP Series MSZAP25VGKD ($1,040) runs an auto-dry cycle after cooling to reduce residual moisture on the coil. The Daikin 2.5kW LITE FTXF25WVMA ($989) includes a fan-only dry mode that can be set to run automatically after the cooling cycle ends. Both are solid entry-level options that take some of the maintenance burden off the homeowner. For the full range of Mitsubishi Electric split systems with auto-dry features, it is worth browsing the collection to compare capacities and models.
Prevention is far cheaper than remediation. A professional coil clean typically costs $150 to $300. A full mould remediation service on a heavily affected unit can run to $500 or more, and replacement costs several times that. Consistent maintenance is the most cost-effective approach by a significant margin.
Frequently Asked Questions About Mould in Aircon
Is mould in an air conditioner dangerous?
Yes, mould in an air conditioner is a genuine health risk. Every time the unit runs, it pushes mould spores through the airstream and into the room. Regular exposure can trigger allergic reactions, worsen asthma and cause persistent respiratory irritation, particularly in children, the elderly and anyone with a compromised immune system.
Can I run my aircon if there is mould in it?
Running a mouldy air conditioner actively spreads spores through your living space, so it is best to address the problem before continuing to use the unit. If the mould is limited to the filter, clean and dry the filter first, then run the unit in fan-only mode to help dry the interior. If the smell persists or mould is visible beyond the filter, stop using the unit and book a professional service.
How do I stop mould coming back in my aircon?
The most reliable way to stop mould returning is to reduce moisture inside the unit after each cooling cycle. Run fan-only mode for 15 to 20 minutes after switching off cooling, clean the filter every four to six weeks during heavy use and book an annual professional service before summer. Units with built-in auto-dry functions handle the post-cycle drying step automatically, which removes the reliance on remembering to do it manually.
How much does it cost to get mould removed from an air conditioner?
A professional coil clean and drain flush to address mould typically costs between $150 and $300 for a standard split system in Australia. More extensive remediation on a heavily affected unit, or mould treatment across a ducted system, can cost $500 or more depending on the scope of the work. If the unit is old and the mould is throughout the internal components, a technician may recommend replacement over remediation as the more economical option.
Time to Act: Your Aircon Should Be Working For You, Not Against You
Mould in an air conditioner is common, but it is not inevitable. The two most effective defences are straightforward. Clean your filter every four to six weeks during heavy use and book a professional service once a year before summer. Do both consistently and you remove the conditions mould depends on before they become a problem.
If mould keeps returning after cleaning, or a technician finds it throughout the coil and internal housing, that is a clear signal the unit needs professional attention or replacement. Pushing on with a heavily moulded system costs more in running costs, health impacts and remediation fees than addressing it early.
If your unit is beyond saving, browse our full range of split system air conditioners to find a replacement that suits your space, or contact the team for advice on choosing a model with built-in moisture control features.
Need expert advice?
Our team can help you choose the right air conditioning system for your space.